Kelly the Culinarian: 2010

Wednesday, December 22, 2010

Cooking with Kelly: A tale of two truffles

There is nothing better than chocolate. Except, maybe, some derivative of chocolate dipped in chocolate. And this, my friends, is the truffle.
I set out to make some snacks for the holidays. A few hours and several bags of chocolate later, I had a delicious little pile of chocolate-covered delights. I made both oreo truffles and cookie dough truffles. While both were very tasty, the cookie dough truffles might be my greatest achievement. Big bonus -- these don't require any cooking at all.


Oreo Truffles
1 bag of oreos
1 package of cream cheese (the light works just fine), softened1 bag of white chocolate chips
Place the bag of oreos in a large freezer bag. Using a rolling pin, smash the cookies until you have a fine consistency. Mix the cream cheese into the oreos, then roll into 1-inch balls.
Freeze for at least a few hours. Melt the white chocolate in the microwave, starting with one minute, then stirring and repeating at 30-second intervals.
Roll the oreo centers into the chocolate to coat, then place on a cookie sheet lined with either a silicone mat or parchment paper. Freeze again, preferably overnight.

Cookie Dough Truffles
1/2 cup butter
3/4 cup packed brown sugar
1 teaspoon vanilla extract
2 cups flour
1 14-ounce can of sweetened condensed milk
1 cup milk chocolate chips
1 package semi-sweet chocolate chips
Using a stand mixer on medium, cream together the butter and brown sugar. Add the vanilla and slowly add the flour, scraping the sides of the bowl as needed. Then add the can of sweetened condensed milk and chocolate chips.
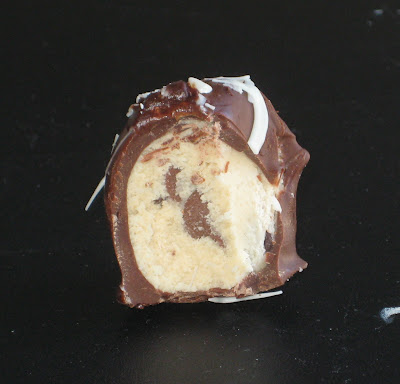
The dough is very sticky, but you have to roll it into 1-inch balls or else they'll fall apart. Place the truffle centers on a parchment-lined cookie sheet and freeze for several hours.
Melt the semi-sweet chocolate chips in the microwave and roll the centers in the chocolate. Freeze again for another hour, then marvel at how awesome these are.

Monday, December 20, 2010

Cooking with Kelly: Marbled oat fudge bars

There is no better season for baking than Christmas time. The oven pleasantly heats your kitchen, there's plenty of people to share treats with and there's nothing more homey than the smell of baked goods.

These bars sandwich a layer of milk chocolate fudge in between oatmeal cookie-like anchors. Combined, you get the velvety fudge along with the texture of the oats. Yum.

So here's how it's done:
3/4 cup softened butter
2 cups brown sugar
1/4 cup unsweetened applesauce
2 eggs
1 teaspoon salt
1 teaspoon baking soda
2 1/2 cups flour (whole wheat works well here)
2 teaspoons vanilla
2 cups quick-cooking oats
1 cup old fashioned oats
1 14-ounce can of sweetened condensed milk
1 16-ounce package of milk chocolate chips

Using a stand mixer on medium with the whipping attachment, blend the sugar, butter and applesauce until creamed. Add the eggs, one at a time until incorporated, then add the salt, baking soda and vanilla. Add the flour slowly on medium speed. Next, add the oats in half-cup increments, scraping the sides of the bowl as needed. Using a greased, rimmed baking sheet, press roughly 3/4 of the mixture into the bottom to create a base.

Next, heat the milk and chocolate chips in the microwave together. I started at one minute, then stirred, then heated it for another 30 seconds until smooth, but every microwave is different. Spread the chocolate mixture onto the oats, then use a spoon to place dollops of the remaining oat mixture on top of the fudge.

Bake at 375 degrees for about 30 minutes, or until the top oat layer is golden brown. Enjoy and share!

Sunday, December 12, 2010

Cooking with Kelly: Chocolate bark

'Tis the season for gift giving. I meet up with my friends this time of year each year to catch up and swap stories. This year, we had a fun time shopping, eating and attending the symphony (wow, I feel like a grown up all the sudden). We usually exchange gifts and I like to make something to give the appearance of being domestic. This year's gift really made the cut. It was easy, quick and impressive looking, despite not turning on the stove OR oven. Score.

Chocolate Bark

10 oreo cookies

1 package white chocolate

1 package milk chocolate

2 tablespoons peanut butter

Crush the oreos and divide them. Melt the chocolate in separate containers in the microwave. I started by nuking them for one minute, then stiring and going for additional 30-second intervals until they were completely melted.

Add half of the crushed oreos to each bowl of chocolate, then add the peanut butter to the white chocolate. After mixing in the extras, add spoonfuls of the chocolate mixtures to a lined cookie sheet. I suggest using a silicone baking mat for this, if you have one, because it makes everything easier.

Alternate the chocolate dollops and using a knife to swirl the two colors together. This will create a cute pattern. Freeze the tray atleast an hour, preferably overnight. Then, break the chocolate into pieces so it looks like bark.

I divided the tray into little treat bags that you can get at the craft store and tied it with ribbon. It makes about six generous portions.

Monday, November 29, 2010

Cooking with Kelly: Beer bread

I love carbs in any form -- pretzels, banana bread, cheddar braided bread, braided loaves ... my the list goes on forever. Anyhow, I thought I'd combine two of my favorite things, beer and bread.

This recipe yields two very dense loaves. This isn't a sandwich bread; it's more like a slice to be served alongside soup or as a snack. And please, unless you want a call from Johnny or Susie's principal about what is appropriate for lunch, don't send this to school with the little ones. It smells deliciously like a frothy adult beverage.


The recipe:

3 cups all-purpose flour

3 tablespoons sugar

3 teaspoons baking powder

1 teaspoon salt

1 12-ounce beer

1 tablespoon olive oil


Preheat the oven to 375 degrees. Sift together the dry ingredients, then add the beer. QUICKLY mix together into a dough, then equally divide between two greased loaf pans. Immediately brush the top with the oil and place in the oven for 45 minutes or until they're golden brown on the top. It's best to work quickly because the beer and baking powder reaction is your only leavening agent.

Monday, November 22, 2010

Cooking with Kelly: Chocolate dream homemade cake

I made this cake last week for a coworker's birthday and it was the talk of the building. Don't tell anyone, but it was super easy!
Here's what you need:
  • Two 9-inch cake rounds
  • 2 cans of icing
  • 11 packages of Kit Kat bars
  • 2 packages of M&Ms
  • Ribbon for embellishment (optional)
Start by making a round cake using whatever recipe you would like. Level off both layers, then ice and stack the cake. You may need more than one can of icing to ice the exterior.
Next, break all of the Kit Kats into individual sticks, then adhere to the exterior of the cake. I used 10 packages, but having an extra comes in handy in case you break one.
The Kit Kats will probably be a little bit taller than the cake. That's OK, the candy will cover a multitude of sins.
Once you've finished adding the Kit Kats, sprinkle M&Ms on top. I used a ribbon for embellishment, but it serves no purpose other than decor.
It comes out looking very impressive. Plus, it's perfect for a ton of different occasions.

Wednesday, October 20, 2010

Cooking with Kelly: Whole roast chicken

Mmm, roast chickens are delicious. They sell these at Jewel for $5 pretty frequently, but I like to make my own because then I know what's in it. I can modify the flavors, know what's in it and often, do it a bit cheaper.

I can get a whole chicken for $.89 per pound. The ingredients you need are:

One whole chicken, about five pounds

1 Tablespoon softened butter

1 onion, peeled and quartered

1 teaspoon canola oil

1 tablespoon fresh chopped rosemary

Salt and pepper to taste

Cooking spray


The first step is to remove the giblets! I've made this mistake once and that was enough. Ick.

Next, rinse the inside and exterior and pat dry with a paper towel. Then, work the skin away from the breast to make a pocket. Mix the butter, oil and rosemary together, then place under the skin. Salt and pepper the skin and the interior, then stuff the cavity with the onion.

Tuck the wings under the bird to allow for even cooking. You can either use cotton kitchen string to tie the legs together or you can use a bamboo skewer to do the job. I personally like to cut a small slit in the skin of the breast to stick the legs in -- it's just one less thing to remove at the end.

Place on a trivet or cooling rack before placing above a roasting rack. This will keep the skin crispy because the fat will drain away. Spray the outside of the bird with a spritz of cooking oil to ensure browning, then cook at 425 degree for 15 minutes. Then, lower the heat to 375 and cook until the bird reads at 165 degrees. My bird took about 45 minutes, but your time will vary with the size of the bird.

Monday, October 18, 2010

Cooking with Kelly: $3 Date Night Pizza

We really enjoy pizza in this household. In fact, my husband has mastered a completely from-scratch deep-dish pizza, complete with cornmeal crust. Yeah, he's a keeper.

But it's a lot of work. Sometimes, we want to take a short cut. We get free bread products through my husband's work, so we enjoy a Boboli pizza pretty frequently. We are also fortunate to have some produce from my humble patio garden. With our free tomatoes and ridiculous amount of Thai basil, I bought a bag of on-sale Italian cheese blend to make a $3 designer pizza.

The method -- heat the grill on high heat. Place the pizza crust face down for three minutes, just long enough to get grill marks. Then, turn down the heat to medium and flip it. I topped mine with the sliced tomatoes, a grind of fresh salt, chiffonade Thai basil and 1.5 cups of shredded cheese. Close the lid of the grill, then wait until the cheese has melted.

In a restaurant, this creation would cost us $10.99. Yay for frugal dinner dates!

Friday, October 8, 2010

Cooking with Kelly: Grilled Banana Dessert

Delicious desserts are not necessarily part of the whole diet thing. And yet, I crave chocolate. Often.

Not that this is original, but my goodness, it was a revelation for me. This dessert weighs in at about 200 calories AND has chocolate. Real chocolate!

Super simple: Use a fresh, not quite ripe banana. Butterfly it like a pork chop or chicken breast. Place on a grill preheated to medium and cook for five minutes. I topped mine with one Tablespoon of chocolate ice cream topping, which is 70 calories on its own.

Delish and still on diet!

Sunday, October 3, 2010

Guest post at Econobusters!

After my lentil soup recipe below, I realized that I've never written about my homemade stock. I love making homemade stock because it's a great way to ensure that you don't waste anything in your kitchen. I recently wrote a blog entry for Molly at Econobusters, one of my favorite blogs.

Molly also writes about frugal living and making the most of a buck, not only in your kitchen, but throughout your home. Check out my guest post here.

Tuesday, September 21, 2010

Cooking with Kelly: Alton Brown's Lentil Soup

I've always wanted to try this recipe for Alton Brown's Lentil Soup. It's such a cheap, complete protien-laden meal. It was also a great way to use up odds and ends in the fridge. I also use my own chicken stock, which is free to me!
When you do the math, I think this batch of soup cost me around $5 to make. I added all of these little containers to my freezer stash, along with having dinner for two and lunch for a few days. The only modification I made to the recipe was adding a can of rinsed black beans as well as subbing a can of peeled diced tomatoes instead of using fresh.
My verdict? It's a bit bland, so I added a dash of hot sauce and 1/4 teaspoon of chili powder before serving. I also topped my with shredded cheddar, but you can treat it like chili and add chopped onions and sour cream.
I would certainly make this again, because the price is right and I loooove Alton Brown!

Sunday, September 19, 2010

Cooking with Kelly: Breakfast on the Go

I've done something very out of character. I'm trying to eat healthier, I'm working out and I've even signed up for a 5K. While I'm far from the chick who wakes up at 5 a.m. and thinks, "You know what's better than this pillow-top mattress and 1,000-thread-count sheets? A two-mile jog through the dark and mist," but I'm getting there.

As the nutritionists say, breakfast is the most important meal of the day. It breaks the fast of the evening and wakes your metabolism back up. But I don't always leave time for breakfast. It's all I can do to drag myself out of bed every morning and make myself somewhat presentable. So at the beginning of the week, I make my own oatmeal packets. When completed, my little meals are between 200 and 300 calories and just need some hot water or microwaving. I use a combination of old-fashioned oats and instant oatmeal for better texture, then fortify this meal wheat germ, which is an amazing diet food
(note that both raisins and wheat germ should be refrigerated after opening. I put the raisins into a reused glass jar). This is the set up I start with, and here are my favorite combinations:


Oatmeal cookie breakfast

1/2 cup old-fashioned oats

1/2 cup instant oatmeal

2 Tablespoons wheat germ

1/4 cup raisins

1/8 teaspoon ground cinnamon

2 Tablespoons Splenda


Chocolate oatmeal breakfast

1/2 cup old-fashioned oats

1/2 cup instant oatmeal

2 Tablespoons wheat germ

2 Tablespoons dark chocolate chips


Saturday, July 31, 2010

Cooking with Kelly: Rosemary roasted pork

We're growing our own veggies and herbs this summer as part of a little experiment. One of the best growing items in our patio repertoire is the rosemary. I have it in a giant urn-style pot on my from porch and it's starting to look like a topiary. But, I love the scent, I love the look and I love the robust, woodsy flavor it imparts to all sorts of foods. I'm looking forward to all the tasty dishes I can accent with this awesome flavor.

The first thing I tried was this recipe I saw on Claire Robinson's show on the food network. However, I only used one large pork tenderloin and marinated the pork much longer than she recommended.

The result was delicious. The pork was aromatic, moist and well flavored throughout. It even stood up to reheating and made for several other great meals throughout the week. A very cost-effective dish, indeed.

Friday, July 9, 2010

Tasty Tours: Good Eats in Australia

That's right, I was lucky enough to go to Sydney last week! It was amazing, beautiful, and ridiculously expensive. I saw a Caesar salad that cost $25! Granted, the exchange rate reduces that, but only slightly.
Here are some of the tastier meals I had:
Prosciutto and rocket pizza -- It didn't taste like what I expected, but I love having my salad on my pizza!
Lamb shank -- There was this nice little lounge near my hotel called Oscar's that had nice dinner specials. For example, on Sunday, I got a steak and ale with mashed potatoes and a salad for $12. This meal was $15 with a glass of house red. And I really liked the red too!
There were a few food habits that I found very interesting in Australia. First, bread for sandwiches are buttered and dusted with salt and pepper before any other condiments are added. Ketchup, even Heinz, tastes sweeter and more 'earthly,' maybe with nutmeg or something added. You can get your French fries (chips) with regular or chicken-flavored salt.
Tasty food and a beautiful country!

Sunday, May 9, 2010

Food find: Bambu Thai

I went out with coworkers to Bambu Thai in Elmhurst for a birthday and the food was delicious. The sauces were tasty and authentic. I had an excellent lunch special of pad Thai with chicken for $7.50 that was a large portion seasoned well with a generous dose of crushed peanuts and fresh cilantro. But my favorite part of this place by far is that they serve all your food in boats! Love it.

Monday, March 22, 2010

Stand Mixer Not-Sunday: Cheddar cheesy braided bread

This bread was out of this world amazing. I got the recipe from The Frugal Girl and it was fantastic. She specifically mentioned that ALDI cheddar cheese works just fine, which is great, since that's usually what I use. Here's her recipe:
3.5 to 4 cups all-purpose flour

2 tablespoons sugar

2 1/4 teaspoons yeast

1 teaspoon salt1 cup water

1/3 cup milk

1 1/2 cups (6 ounces) grated sharp cheddar cheese

In mixer bowl, combine 1.5 cups flour with the sugar, yeast, and salt. Heat water and milk to 120 degrees F, and add to dry ingredients. Beat for 3 minutes, and add enough of the remaining flour to make a soft dough.
Turn out onto a floured surface and knead in cheese, 1/2 cup at a time. Place kneaded dough into a bowl, cover with a wet tea towel, and let rise in a warm place for 1 hour, or until doubled.
Punch dough down and divide into 6 pieces. Roll each piece into a 12-14 inch rope. Braid three ropes together and place on a greased baking sheet. Repeat with remaining three ropes. Cover braids and let rise until doubled, 30-45 minutes.
Bake in a preheated 350 degree oven for 20-25 minutes or until lightly browned. Let cool on a wire rack.

A stand mixer for this recipe is pretty critical. I also let my bread cold-rise in the fridge, which I think imparts better flavor. Also, I found the easiest way to knead the cheese into the bread was to take a little portion of the cheese, stick it in the middle and fold it onto itself. My bread wasn't as brown on top, but a little egg wash could fix that.
I'm going to try to this dough as a roll/bagel type concoction too.

Monday, February 1, 2010

Cooking with Kelly: Brunch!

Despite my distinct dislike of morning as a general concept (I prefer to skip them entirely by sleeping through them) I *heart* brunch. We recently had a friend over for brunch, which is cost effective and delicious. It's also great because you can dress up simple ingredients for an impressive presentation.

We served mimosas (mmmm), frittata, roasted potatoes and banana bread. Here's the breakdown:

For the mimosas, it's just one part orange juice to three parts champagne. Bubbly and delicious.

This particular frittata was a bacon, cheddar, onion and turkey number. I cooked five slices of bacon, drained the fat and chopped up the bacon, then caramelized one small finely diced onion. I then added four slices of chopped turkey and added the bacon back. Then, I poured in eight eggs slightly beaten with a quarter cup of milk. I also added a teaspoon of Italian seasoning and a pinch of ground pepper and salt. I mixed a cup of shredded cheese in with the eggs too. After the eggs started to set up, I put it in an oven at 350 degrees for 15 minutes. I topped it with more cheese before serving and served it with light sour cream.

And finally, for the potatoes, I scrubbed four russet potatoes and microwaved them for three minutes. Then, I chopped them and cooked them in one tablespoon of olive oil and a teaspoon of rosemary, stirring often, until golden.

Breakfast is the most important meal of the day.

Monday, January 4, 2010

Cooking with Kelly: Roasted Turkey Breast with Vegetables

I recently got an awesome deal on a turkey breast that's been sitting in my freezer ever since. I've never made a turkey breast, but when the price is free for a seven-pound turkey breast, I'll give it a try.

And I must say, this is some of my best work!
After defrosting for three days in the fridge with a bowl underneath, I rinsed the turkey breast and removed the neck. I patted it dry with paper towels, the thoroughly salt and peppered the inside and outside. I place one half stick of softened butter under the skin and sprayed the outside skin with a cooking oil. Then, I sprinkled on about 1/4 teaspoon each of steak seasoning and poultry seasoning. I also added about a half teaspoon of paprika.

I placed the turkey breast in a cooking bag made for turkeys. Yes, it's taking the easy way, but it speeds up both the cooking and clean-up process, so I'm all for it.

I also added a pound of diced red potatoes, three large sliced carrots and one small onion, sliced.

I cooked the whole thing for two hours at 325 degrees, then let it rest for 20 minutes before carving.

There was a lot left over, but I have big plans for all this. It's only saving if you use it all!