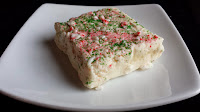
 'Tis the season to be sugar high! When Cabot Creamery agreed to sponsor me for this weekend's meeting of the Chicago Food Swap, I knew exactly what I wanted to make: fudge! I used the company's butter and sour cream to craft this creamy, crunchy concoction to swap with my closest 85 friends on Saturday. Unfamiliar with a food swap? Read my food swap posts now.
What I love about this recipe is the texture of the final product: it's creamy smooth thanks to the marshmallow fluff and melts in your mouth because of the white chocolate. The crushed candy adds texture to the end result with the crunchiness offsetting the tendency of fudge to just melt away and gunk up your mouth. Basically you get the meltiness of an after dinner mint, the crunch of a candy cane, the flavor of white chocolate and the airiness of marshmallows. Divine.
Another reason I love this recipe is it's so fast and easy. The most time-consuming aspect of the entire affair is crushing the candies. You do need a candy thermometer to pull this one off, but once the mixture reaches the right temperature, the tough work is done. Stirring in all the ingredients is a bit of a workout, but you'll need it because you won't be able to resist eating this white chocolate peppermint fudge.
A word about setting and serving this fudge: It's best to not rush the process and allow it to set up at room temperature overnight. If you stick it in the fridge, you risk this stuff getting rock hard. Only after it's set up for a few hours should you use the aluminum foil to remove it from the pan, then employ the services of a large, sharp knife to cut it into manageable pieces.
 I'll be displaying and swapping my fudge in sleeves that started their lives as CD holders. I ordered these online for super cheap and like that you can see what you're getting. If that's not a concern for you, these can be gifted in tins or stored in airtight containers. I'd go with a container over a plastic bag because you don't want it to get mushed up or for the flavor to leak out into any surrounding food. Peppermint-flavored cheetos are not delicious; I've tried.
Candy Cane Crunch Fudge Recipe
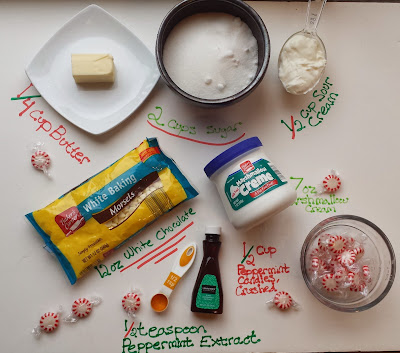
1/4 cup Cabot salted butter
1/2 cup Cabot sour cream
2 cups sugar
12 ounces white chocolate
7 ounces marshmallow fluff
1/2 cup crushed peppermint candies
1/2 teaspoon peppermint extract
 You'll need a candy thermometer, a silicone spatula, offset spatula and an 8x8 pan for this recipe. Start by lining the pan with aluminum foil and spraying with some cooking oil. This recipe goes fast, so prep and measure all your ingredients and have them at the ready.
Place the butter in a nonstick pot and melt, then add the sour cream and sugar. Stir to combine. Bring to a boil and cook until the candy thermometer reads 234 degrees (also called the soft ball stage).
Remove from the heat and stir, then add the chocolate and marshmallow fluff. Stir until combined. Add the extract and candy, folding to combine, then pour into the lined baking pan. Use the offset spatula to level the mixture, and add any extra candy, sprinkles or sugar for decoration at this point.
Allow to cool at room temperature until set, which will take a few hours. I left mine overnight. To complete, remove the fudge from the pan using the foil, then peel off the foil from the bottom of the fudge. Use a very sharp, large knife to cut into squares.


3 comments:
Love the way this looks...so pretty for the holidays. Thanks for sharing!
I can't wait to try this recipe...it's so perfect for the holidays!
Kelly, we got one at the Food Swap (along with about 10 of your sample bites!) - the texture and flavor is so fresh and not overwhelmingly minty. Thanks for sharing the recipe... though I'm a little afraid of having a whole batch in the house if I make it. :-)
Post a Comment